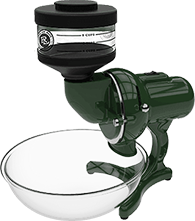
A GUIDE TO HOME FLOUR MILLING WITH THE LEE HOUSEHOLD FLOUR MILL
Milling flour with a Lee Household Flour Mill is easy. Follow these steps for successful home milling:
STEP 1: DECIDE WHAT KIND OF FLOUR YOU WANT TO MILL.
Depending on the recipe, you’ll need to have the grain that will produce the flour that will work the best. In some cases, you can try different types of grains, or combinations of grains, to produce flour with different flavor characteristics. We suggest using certified organic whole grains for the most nutrition and flavor. Store any unused grains in an airtight container.
STEP 2: SCOOP THE GRAIN INTO THE GRAIN HOPPER ON TOP OF THE MILL.
The grain hopper on the Lee Household Flour Mill has measuring marks for up to 8 cups to help guide how much you will need to mill. Keep in mind that the amount of flour you get from the whole grain will be greater than the amount of the grain you put into the hopper. Approximately 2:1.
STEP 3: MAKE SURE THE FLOUR BOWL IS IN PLACE AND THE BOWL COVER IS ON (THIS IS VERY IMPORTANT).
The Lee Household Flour Mill includes a fitted cloth skirt that extends from the chute of the mill and around the Pyrex collecting bowl. This prevents your milled flour from getting on your counters or in the air. It manages the air current from the grinding process, keeping the flour in the bowl while letting the air escape through the fabric.
STEP 4: TURN THE POWER SWITCH ON.
The switch is located on the top of the mill’s motor housing. In the unlikely event the motor starts to overheat, the mill will automatically shut down to prevent damage to the motor.
STEP 5: CONTINUE TO ADD WHOLE GRAIN TO THE HOPPER IF NEEDED.
The Lee Household Flour Mill has an automatic feed hopper that adjusts the amount of grain being fed into the mill for optimum milling.
STEP 6: TURN OFF THE MILL WHEN ALL KERNELS HAVE BEEN MILLED.
While monitoring the progress of your milling, you will hear a difference in the sound of the motor when all wheat berries have been milled. The mill should be turned off when your milling is complete.
STEP 7: MARVEL AT THE FINENESS OF THE FLOUR IN THE FLOUR BOWL.
The Lee Household Flour Mill produces finer flour than any other consumer-grade flour mill and finer even than some commercially produced flours.
STEP 8: REMOVE THE BOWL COVER FROM DISPENSING CHUTE AND BOWL.
First, wait for the airflow within the bowl and cover to dissipate. Then, lightly tap the bowl cover to shake flour from the inside of the cover. Finally, remove the cover gently, and shake off the excess flour over a trashcan to avoid excessive flour dust in your kitchen.
STEP 9: QUICK CLEAN UP.
Remove the screws holding the front cover, remove the rotating disk and dust off any residual flour in the milling chamber with the brush that is included with your mill. The Lee Household Flour Mill is designed to make routine cleanups quick and easy. Regular cleaning will ensure allergen control and that remnant flour in your mill does not become rancid.
STEP 10: GET BUSY MAKING SOMETHING TASTY.
If you need recipes or tips on baking, check out our recipes section.

